Excel Training: Autofill
The autofill is a commonly used action when working with Excel. It saves precious time by avoiding repeating many operations.
Copying numbers
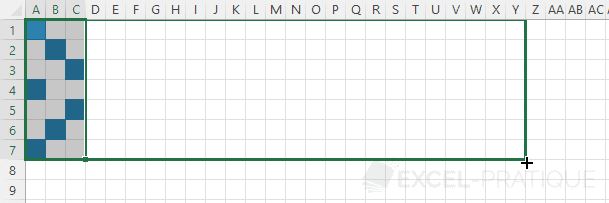
Enter the number 1 in cell A1 and copy this cell to line 7:
![excel autofill](https://www.excel-pratique.com/view/en/excel-training/img/autofill/excel-autofill.png)
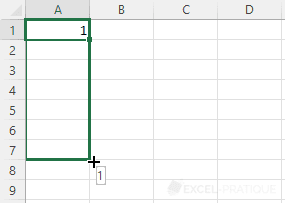
In this case, the number 1 is simply copied:
![excel autofill 1](https://www.excel-pratique.com/view/en/excel-training/img/autofill/excel-autofill-1.png)
To get a numbering, enter the number 2 in cell A2, select the 2 cells and copy to line 7:
![excel autofill numbering](https://www.excel-pratique.com/view/en/excel-training/img/autofill/excel-autofill-numbering.png)
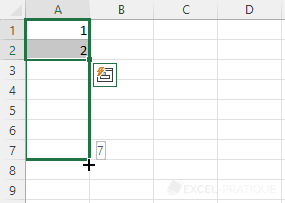
This time the increment has been specified, so the value is increased by 1 at each copy:
![excel autofill numbering sequence](https://www.excel-pratique.com/view/en/excel-training/img/autofill/excel-autofill-numbering-sequence.png)
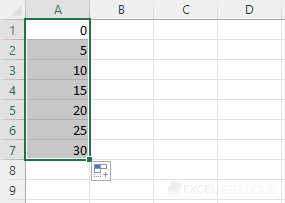
Now enter the values 0 and 5 (instead of 1 and 2) and copy:
![excel autofill 5](https://www.excel-pratique.com/view/en/excel-training/img/autofill/excel-autofill-5.png)
In this case, each new copied cell is equal to the previous one + 5:
![excel autofill 5 copy](https://www.excel-pratique.com/view/en/excel-training/img/autofill/excel-autofill-5-copy.png)
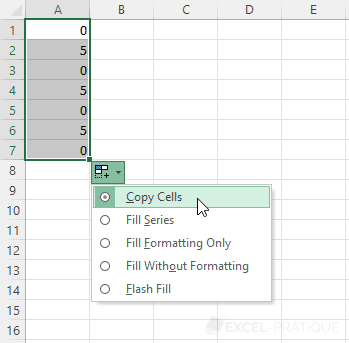
Note that after copying cells, you can change the copy mode if necessary (for example, to not increment anything):
![excel autofill without incrementing](https://www.excel-pratique.com/view/en/excel-training/img/autofill/excel-autofill-without-incrementing.png)
Copying dates
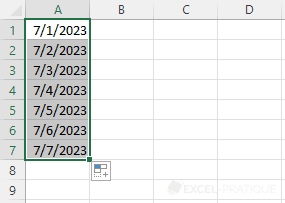
If a single cell containing a date is copied:
![excel autofill date](https://www.excel-pratique.com/view/en/excel-training/img/autofill/excel-autofill-date.png)
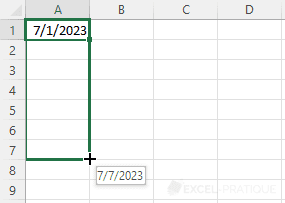
An increment of 1 day is automatically applied by Excel:
![excel autofill date 1 day](https://www.excel-pratique.com/view/en/excel-training/img/autofill/excel-autofill-date-1-day.png)
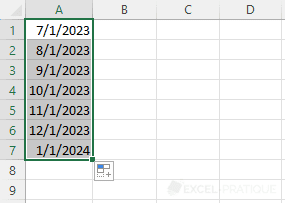
To modify the increment (for example, 1 month), enter the second date just below and copy the 2 cells:
![excel autofill date month](https://www.excel-pratique.com/view/en/excel-training/img/autofill/excel-autofill-date-month.png)
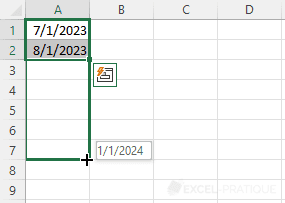
This time it is indeed the month that has been incremented:
![excel autofill date 1 month](https://www.excel-pratique.com/view/en/excel-training/img/autofill/excel-autofill-date-1-month.png)
Other examples of copying
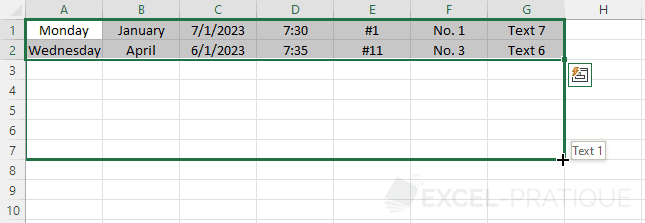
It is also possible to perform an autofill with other data such as days and months in text format, hours and textual values containing numbers:
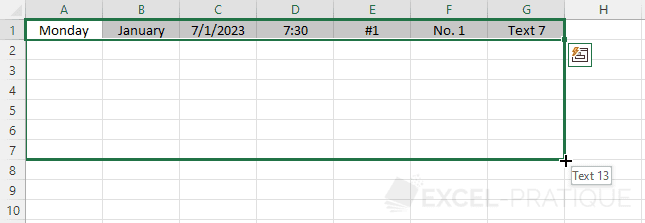
![excel autofill examples](https://www.excel-pratique.com/view/en/excel-training/img/autofill/excel-autofill-examples.png)
To get:
![excel autofill day month hour text](https://www.excel-pratique.com/view/en/excel-training/img/autofill/excel-autofill-day-month-hour-text.png)
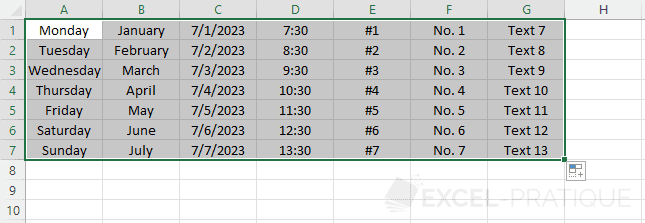
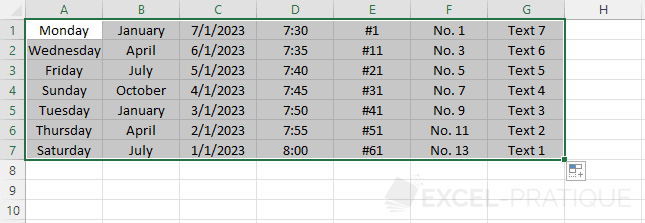
A different increment will this time be defined for each of these values:
![excel autofill day month hour text defined](https://www.excel-pratique.com/view/en/excel-training/img/autofill/excel-autofill-day-month-hour-text-defined.png)
The data has been copied while respecting the defined increment (including "7/1/2023" and "Text 7" with their negative increment):
![excel autofill other types](https://www.excel-pratique.com/view/en/excel-training/img/autofill/excel-autofill-other-types.png)
Copying with formatting
Note that when you copy cells containing formatting:
![excel autofill format](https://www.excel-pratique.com/view/en/excel-training/img/autofill/excel-autofill-format.png)
The formatting is also copied with the cells:
![excel autofill formatting copied](https://www.excel-pratique.com/view/en/excel-training/img/autofill/excel-autofill-formatting-copied.png)
Exercise
It is now time to put into practice everything that has been seen so far...
Download the following file: exercise-3.xlsx
The first sheet of the downloaded workbook will look like this:
![excel exercise autofill](https://www.excel-pratique.com/view/en/excel-training/img/autofill/excel-exercise.png)
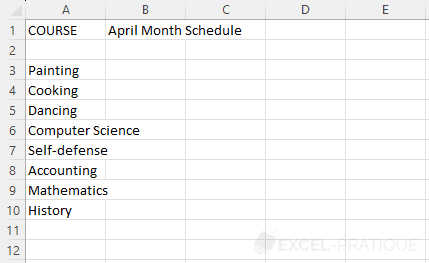
The aim of this exercise is to use the knowledge learned during these first lessons to create the following schedule (trying to get as close as possible to this result):
Note: to display the 30 days of the schedule, enter the date of 1/4/2024 in cell B3, modify the date format to obtain the desired display, change the text orientation and copy the date to the right.