Excel Course: IF Function, Copying Formulas
IF Function
Click on "Insert Function" and select the IF function.
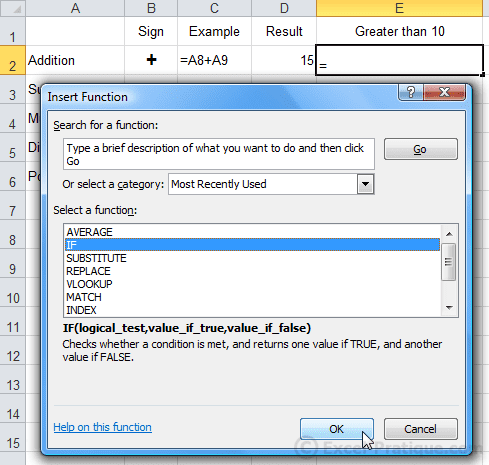
Our goal here is to have the function display "Yes" if the result is greater than ten, and "No" otherwise.
The logical test will tell us whether the function should display "Yes" or "No".
- Logical test: D2>10 (this means that we are asking whether D2 is greater than 10)
- If it is true, the function will display "Yes".
- If it is false, the function will display "No".
Enter the required values and press OK.
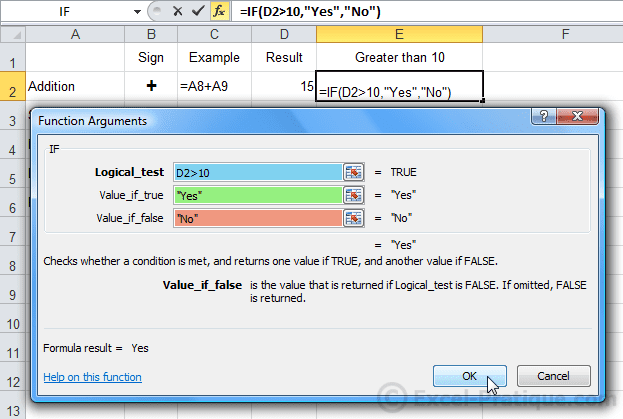
A "Yes" will then be displayed in E2.
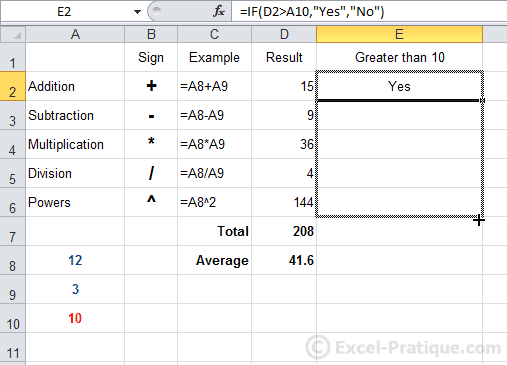
Now AutoFill down to cell E6.

The results are correct (the formulas have been adapted: each time the row has been copied below, the cell row number in the formula has been incremented by 1).
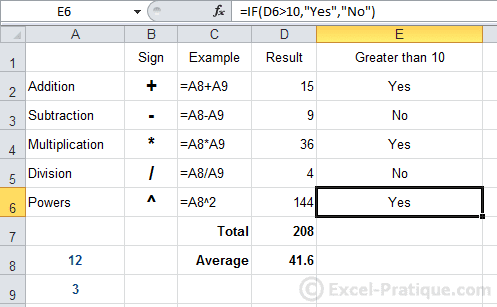
Now, if we want to change the limit value of 10 (which determines whether "Yes" or "No" should be displayed), we will have to edit each formula. It's not very practical.
So instead of entering the value 10 directly into the formula, we will refer to a cell that contains the number 10. Then if we want to change the limit value, all we will have to do is change the value in that cell.

In order to do this, simply replace "10" with "A10":
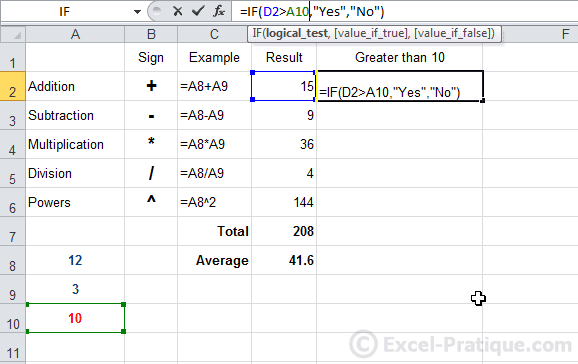
AutoFill the formula.
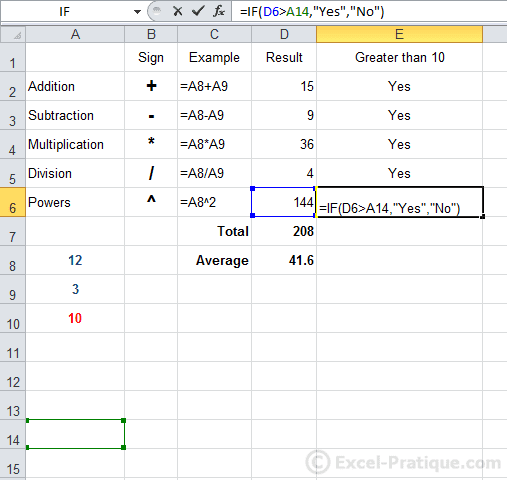
You can clearly see that there is a problem because the reference to cell A10 has not been preserved in each of the formulas...
To fix this, we have to "fix" A10.
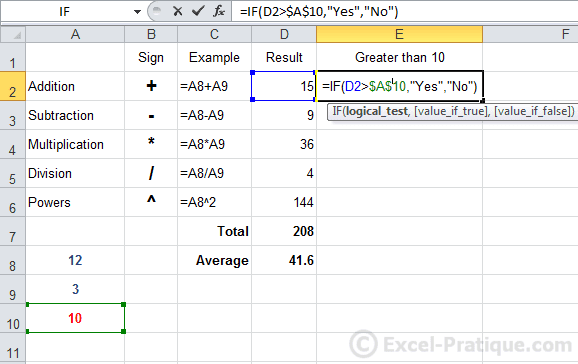
One way to do this is to add a $ code before the row and column numbers.
So replace A10 with $A$10 (or with A$10 because in this case, we only need to "fix" the row number).
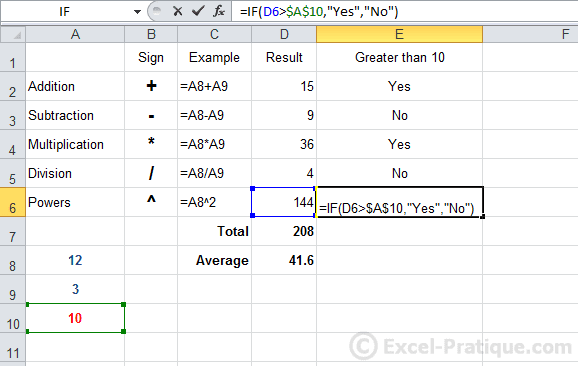
After AutoFilling, the results are now correct:
Another option is to rename cell A10:

And replace A10 with limit which in this case will be the name of the cell.
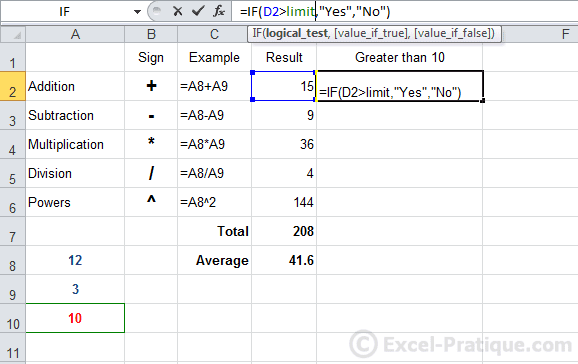
After AutoFilling, the results are also correct in this case:
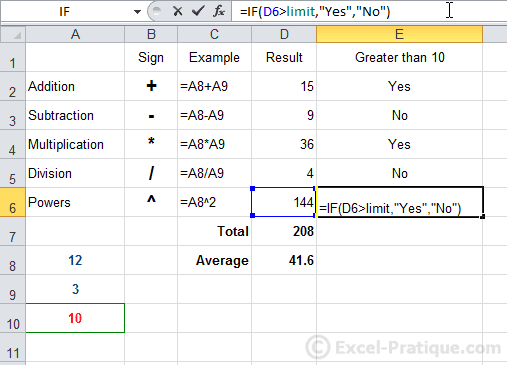
You can now change the limit in all the formulas just by editing cell A10.
